Cast Iron Smooth vs Rough: What Is the Difference?
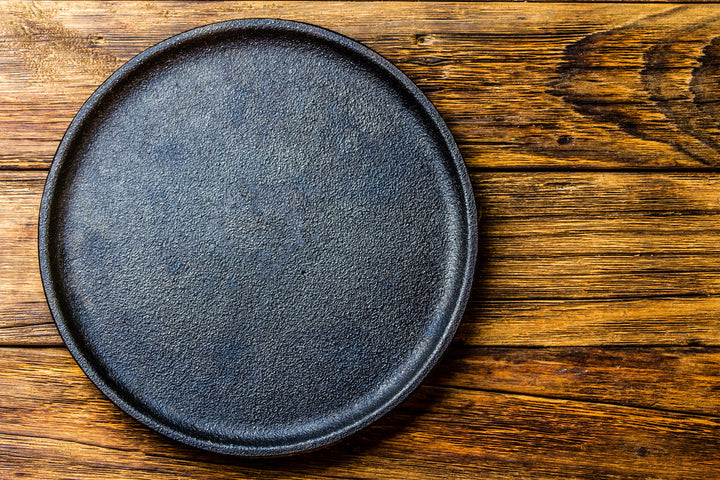
The first time you see a new cast iron skillet you might notice its pebbly surface and think that something is wrong with the pan. Modern cast iron cookware is almost exclusively made in this way, with a slightly rough cast iron texture. To add some confusion, this is a relatively new development for cast iron. If you're familiar with vintage cast iron skillet you'll know that they tend to look and feel much smoother and lighter in comparison to their modern counterparts.
Old and new pans are made of the same materials, and they are both made in sand casts. So why the big difference in texture? Mainly, manufacturing methods have changed drastically between the late 1800s when skillet cast iron was first being made until now. Some of the changes have saved money and some have been for practical reasons.
Both smooth and polished cast iron make for very usable, versatile cast iron pans. There is some hot debate among cast iron lovers over which is better, a polished smooth surface or one with more texture.
We will explain some of the differences between the two types of pans, but we don't think that one is better than the other. Both vintage and new cast iron pans have made millions of delicious meals.
Old Cast Iron Making Methods
From the late 1800s to the mid-1900s cast iron was all made by hand. Iron and scrap steel were melted down and then poured by an ironworker into the mold. This hand pouring had a level of control that allowed for more intricate designs and the resulting pan was several pounds lighter than its modern counterparts.
The resulting pan was then ground down, or milled, using stone. These pans were sold unseasoned to the consumer. They had a super smooth, satin-like finish that appears a little darker due to the extra light reflection. The entire process of making the cast iron pan took at least 3 days.
New Cast Iron Making Methods
New cast iron cookware is made by machines in approximately 90 minutes. After the iron/steel mixture is melted, it is poured into molds made of sand, powdered clay, and water. The cast iron is tumbled to remove any extra sand from the mold by machine.
Part of the reason why these pans are made in such a short period of time is that the manufacturers have cut out the polishing step in the process. These pans are not ground smooth like their predecessors. Dropping this step helped to keep pricing competitive. They have a pebbly, rough finish and are dark grey in color. They are also usually pre-seasoned in the factory shortly after they are made.
Why did they stop polishing cast iron?
According to some manufacturers, the modern rough surface cast iron pots and pans helps the seasoning oils to adhere better than a smooth finish would.
Smooth cast iron does not sell well commercially compared to rough iron. In the 1980s when more smooth iron was available, some manufacturers discontinued selling polished iron because they just weren't selling enough of them. Where there is no market to buy, there is no motivation to make a product.
Your old cast iron may have even started out rough and smoothed naturally. Using metal utensils and restoring rusty pans can wear down the surface of the pan over time and create a smoother feel.
Which is better: Smooth or Rough?
As we mentioned earlier, this is a hotly debated topic among cast iron cookware aficionados.
Old-fashioned purists will tell you that the smooth surface of a vintage piece is the ultimate choice for its non-stick properties. Some say that building a good seasoning on a smooth surface is more difficult, as there are fewer tiny indents for the oil to adhere to.
Fans of modern-day cast iron know that the rougher, pebbly surface is easier to season.
Although smooth cast iron cookware may take a little more work to season, both types of pans can be well seasoned. There is no consensus on this debate. It all seems to comes down to personal preference. Pan to pan, differences can be seen but those are mostly a result of seasoning. Regardless of texture, bad cooking results usually come about from an uneven seasoning cast iron.
Want to learn how to properly season your cast iron? Find all the answers in this FREE step-by-step guide:
Can rough cast iron be polished smooth?
If you have a rough iron pan at home and would prefer to work with a smooth surface, you're not completely out of luck. There are ways to grind down your pan and get the smooth result you are looking for but they come with a few risks.
If you grind down your pan, you may risk:
- thinning out the pan too much, which can cause weaknesses that lead to cracking or breaking
- thinning out the pan unevenly, which can also lead to cracking and creates an uneven cooking surface
Because of these risks involved, this is a process best left to your inexpensive cast iron pieces that you don't have a lot of financial or emotional investment in.
How to smooth your cast iron pan at home
There are as many different methods of restoring cast iron as there are letters of the alphabet. Here are some methods we don't recommend:
- Sandblasting. Sandblasting will make the surface smooth, but its too harsh for your cast iron pan to handle and the chance of damaging the pan is high.
- Don't remove the seasoning first. Some websites recommend using easy off or lye to remove seasoning. This is a completely unnecessary step. Why use extra chemicals if you don't need to? Skip it and move straight on to sanding.
Sanding Method
This method, which involves sanding down your pan is effective and avoids damage:
- First, you will want to find something you can use to grind your surface down smoothly. It's easiest to use an electric hand sander, but you can sand by hand or using a sanding block if you don't have the electric version available to you.
- Use a 60 - 80 grit sanding pad or sandpaper, and get to work on the pan.
- Sand the pan in circular motions. Pay extra attention to the hard to reach corners of the pan. If your electric sander has a pointed tip, use it to fit into the smaller crevices in the pan.
- Keep an eye on the surface throughout the sanding process. You want to sand it as little as possible to avoid making it too thin and protect the integrity of the pan.
- Using an electric sander, this process should take 10 minutes at the most. Of course, hand sanding will take longer.
- If you want an even smoother result, move up to a higher grit sandpaper and lightly sand the surface.
- Wash the pan with soap to remove any dust or iron debris and dry thoroughly.
- Your pan's seasoning has been completely removed from this process. Season thoroughly like you would a brand new pan. If you need some help, check out our guide on how to season cast iron properly.
Final Thoughts on Cast Iron Texture
You can't go wrong with either option. Cast iron pans are a great addition to your kitchen, no matter which type you choose. If you're not sure what kind of pan you prefer, test them both out and see what you like!
1 Response
Leave a comment
Comments will be approved before showing up.
Also in Tips


Azim Moore
April 19, 2021
Thanks…l appreciate the info…very helpful in understanding skillet & curing etc. …again thanks much ~sincerely Azim Moore.😊